Felt roof tiles
My most recent job was to supply and install some felt roof shingles. It’s not something I have had to do before but the customer was adamant on them so I looked into them in more detail so I could carry out the works.
So I thought I would share my experience and offer some guidance if it’s something you are considering on undertaking.
To start with and as standard for me I searched around for best suppliers. I typically won’t just go to the roofing supplier in the area I have to look around to make sure I am getting the best deal. I then looked into colours, shapes and how to install.
After searching for a supplier I ended up actually going with Wickes. They had them in stock and I could go and pick them up from a local store. The reviews online were really good as well and this is where I found they offer a detailing strip on a roll (more details to follow). Also I found by the time I ordered the product online and paid shipping I would end up paying considerably more.
So Wickes it was.
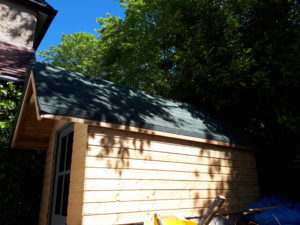
The customer specified a green square tile. This comes on strips of about 900mm and has about 5 tiles on each strip. These are easily set up and fixed to the roof substrate.
What really helped was that I watched the tutorial video a couple times that the manufacturer in this case “IKO” has created to help the installer. This was very useful and definitely worth a watch and it’s found on youtube: https://www.youtube.com/watch?v=pUSGEmOZMyE
These videos always make it look easy, so I wasn’t expecting it to be so. However I was pleasantly surprised, I was also impressed with how quick they go up and the quality look of the finish.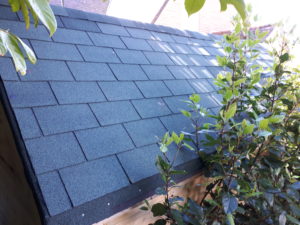
Work out how much you need
To start with measure the roof to work out quantities. A pack generally covers about 1m2 but always allow a bit more. In the video it shows you how to install the detail strip by using the tiles supplied but to do this you have a lot of wastage. (The detail strip is installed all around the edges of the roof before the felt tiles go up). So I recommend buying the detailing roll which I found Wickes supplied but there was no mention of this product on the Youtube Video.
The measurements for the roof I was working on was 3.6 x 1.2m on per side, for this I needed 5 packs of felt shingles 2 packs of clout nails 6 tubes of roof sealant and just over 1 roll of underlay felt. I also purchased 2 rolls of the detailing strip. This was more than enough for the main bits but if you want to do the ridge as well then you would off needed another roll. However I followed the way they do it on the video by using the individual tiles and in this case it was what was left over from the tiles and the detailing strip.
Process
I won’t go too much into the process of installing as the video is better to watch. So instead a few tips to guide you along the way are below, but watch the video first then read my tips as they will make more sense.
Tip 1) There was a lot of wastage so I decided to do the ridge the way the video shows, by using individual tiles and tacking them down, it takes more time but I was able to use up all the off cuts and it looks a lot more detailed and gives the roof a really nice professional finish. I personally think it looked more like a roof on a house then just a shed.
Tip 2) I stuck the bottom of each tile down which makes it feel more solid and gives me more confidence in strong winds.
Tip 3) I used a staple gun for the initial felt underlay to get it down really nice and snug.
Tip 4) I would definitely recommend a second pair of hands, I had quite an awkward site and I needed someone constantly holding the other end or passing things up.
Tip 5) Try and leave the packs out in the sun if possible, before and during the works. I found it makes the tiles more malleable and prevents the felt from splitting when doing any awkward bits.
Tip 6) Work out exactly the size of clout nails you can use. You don’t want to small and to long will go through the roof ply. I found 13mm worked ok on the bulk of the roof tiles but when we got to areas where the felt was doubled up larger would have been better possibly a 20mm clout.
Tip 7) Use a chalk line it was a great tool to have. I could mark up every few lines to make sure I was staying nice and level on each run of tile strips.
Tip 8) Also get a tool belt you need to nail constantly and it saved me loads of agro just having the clouts in my pouch.
Tip 9) Keep the area clear, you will find there’s bits of felt and plastic wrapping everywhere when you get going. So take some time to bag up the waste throughout the job. This keeps the area safe and means less clearing to do at the end of the job.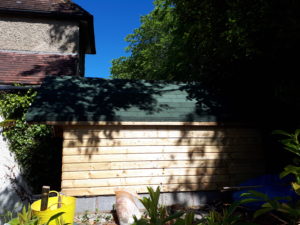
Tip 10) Use some packing where the ladder rests against the roof. Especially when its hot the ladder rubbing against the felt can cause marks. So a dust sheet or some sponge rubber keeps the roof protected.
These are my main tips I can think off, but as usual any queries or questions please leave a comment.
This isn’t the cheapest material and if you just want something cheap and cheerful to go with some standard roof felt would suffice. But if you want that wow factor then this is definitely the product to use. I am also very confident after handling the material that it will last a hell of a lot longer than a standard shed felt and an aesthetically pleasing long lasting product for a slightly higher cost is definitely the way to go.
Hopefully this post helps you on your roofing project. As always feel free to message me if you have any queries.
Thanks for reading.
Toby.