Smoke alarms / Carbon dioxide alarms

Rated fire alarms and carbon dioxide alarms

I use these fire alarms and Co2 alarms  all the time now manufactured by Fire angel.

There are loads on the market and when i researched the products back when i was getting into lettings these where one of the top rated alarms, so i installed them in my properties and they are great. Also if you read up on them now they are only getting better and are still some of the best rated on the market.

Cool features i like on there alarms are that they can tell the difference from actual smoke to burnt toast so no more trying to wave the fumes away from the alarm while trying to air the kitchen out.

10-Year-Thermally-Enhanced-Optical-Smoke-Alarm-FireAngel-ST-622

Also they have a sealed lithium battery that will give a 10 year life so ideal for your investment properties and residential property alike and gives you real piece of mind.

Also i find them really easy to install, the unit is completely sealed its literally a matter of installing the back plate then the main unit twists onto the back plate and its locked on and by locking it on to the back plate that activates the alarm.

They also produce one that can link to other smoke alarms and heat sensors and they are great if you have different sections of the property that you want to linked so as soon as one is set of, it will set the others you have linked to it. Again really easy to install and link the other alarms.

Fire angel also produce the heat alarms with sealed lithium battery and can be linked so again will set the whole system off if activated.

Then last but not least they do a great Co2 alarm, put these in the same room of where ever there are any heat sources, such as boiler cupboard,  gas fires, wood burners and so on.

FIRE-ANGEL-CO-9BQ-CARBON-MONOXIDE-ALARM-BRAND-NEW-BOXED

These are great and warn you when the battery is coming to the end of its life, i have them all over the place now..

To note read the instructions on these products it will explain how to set them up and also where to site the device for best results.

Squeaky floorboard causes

Squeaky floors due to bad plumbing

I’ve spent a few days trying to sort out a problem in my property which is squeaky flooring. It’s been a real problem when trying to settle our 14 month old. I would finally after an hour of trying get her to fall asleep and as I go to leave the room the floorboards make a massive noise and I have to start all over again trying to put her down.

Now you would think this is just a simple task bang a couple nails in and that will solve it. But DON’T DO THAT…

I went to carry out a job for a customer who had really squeaky floorboards and they were even bowing in places, rather than just nail the boards down I took them up to see what was happening and in the end I’m glad I did.

Whoever had laid the pipe for the heating system decided to lay 6 pipes side beside, a few of them being 22mm the whole length of the room and these where just notched in top of the floor joist so a fixing was not possible.

When the carpenters came in to lay the floor  these boards where just left loose with about 3 really bad fixings over a 4m span needless to say they move squeaked the whole chi -bang.


It’s always going to be hard to really sort this type of floor out without taking it all up and starting again, but in this case I was able to take out that particular section and as it was being carpeted install different size boards completely spanning over the said pipe work curing the problem.


But going back to my problem floor it started when I had the boiler changed from the old gravity fed system to a combi-boiler. As it was just a boiler change all the existing pipework stayed in-situ and just the bits around the boiler changed now it’s a known problem for the old pipework to weep as its gone from minimal pressure to a sealed system which maintains 2 bar of water pressure.

I have never seen it happen before my house but it happened to me and when I noticed the drips coming through the ceiling I took immediate action, I cut up the chipboard flooring first floor, with my multi tool(see tool reviews) I did it all properly marked on the blade the depth of the board and started cutting, it went straight through the pipe.

The drip then became a gush, before I could get the rest of the board up and access the pipe the contents of my central heating system was everywhere.

So it happens to the best of us believe me.

When I had cleared up I took stock of the situation and its was plain to see what happened apart from where I had cut the pipe open, the original plumber when the house was built laid a 15mm copper pipe on top of the supporting RSJ with no packing so over the years with foot traffic in that area being particularly high the pipe had become flattened and by the looks of it had been leaking for a long time before I had the property. The final straw was asking it to take 2 bar of water pressure. I cut out the damaged section of pipe work but unfortunately couldn’t move it anywhere else so it had to take the same route the only difference being that I packed either side of the pipe meaning the floor boards would not rest on it at all.

After an eventful day the boards where put back, more laid back and left for 12 months before I finally got around to sorting the floor out properly.

The boards where laid with chipboard flooring sheets so I had to replace it in sections but to do this I would need to cut them back to the joists to cut new boards in. It was easier said than done as the joist either side where in the other rooms so instead I had to make up new timber work to fit the new boards on.

The best way to do this is to fit noggins in between the existing joists, this takes the bulk of the weight then if you want to be able to get a few more fixings in then I fit a batten to the underside of the existing floor that you’re going up against then you have a fixing pint for your new floor and this helps prevent any sponginess..

Finally now that the new carpet has gone down its all looking good, what is always a good idea though is mark the location of the pipe on the floor as you are laying the new flooring down this will hopefully prevent and occurrence of what happened to me.

So morale of the storey if you have a squeak don’t go guns blazing and use that Makita impact driver to drive a screw in as you don’t know what surprises are waiting for you under the floorboards.

Best brick sealers

Brick sealant

As discussed briefly in one of my blogs, a good way to protect your external walls from water penetration is by the use of a brick sealer. I have had good results from the Ronseal product listed below, its easily applied by brush or roller and quickly makes the brickwork your painting it on water resistant. DO NOT get it on the windows though its really hard to get off.


Breathable sealant

Another option now though is to use a water sealer that still allows the brickwork to breath, so its stops water penetrating but still lets moisture out and the brickwork breath. This is a good option if you have had brickwork that’s been saturated for years. If you coated this up with a product that doesn’t allow the brick to breath you are in essence sealing in the moisture already in the brick work which could cause problems and in fact push the moisture into the building more so. See link below to amazon where yo will find the breathable equivalent.


Winter property maintenance jobs to check/carry out

Property maintenance

This time of year the general exterior of the property needs look at.

I would start with gutters and down pipes, make sure all the gutters are clear of debris’ and that the downpipes flow properly.

I have just come of a job where this was not checked for years and the state of the walls internally where shocking. It was an older property so it was what we call solid walls or 9” walls. This means there is no cavity so over time with this massive amount of water penetrating through the brick the damage to the inside can get really bad.

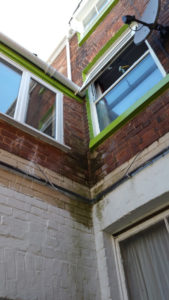
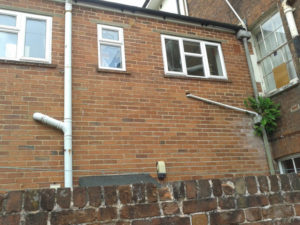
A good indicator of overflowing gutters/downpipes in that on the wall directly below the overflowing section there will be a build up of green algae and in extreme cases plant growth will be apparent.

Again I can’t stress enough that just by annually checking the gutters and down pipes it will really keep repair works to a minimum. It’s a cause of damp and mould growth and worst case the wall will need to be completely stripped back to the bare wall, dried out then re-boarded and plastered costing a lot of money. If you’re not happy getting up a ladder yourself there are people now that offer such services and for less than £100 for a standard terrace house  you could get the gutters checked and cleaned out, well worth the cost.

Windows

Windows are usually overlooked. PVC windows have a life span of about 10 years, you could easily extend this by keeping the windows clean inside and out and keeping the window hinges lubricated with 3 in  1 oil. This prolongs the life of the window dramatically, also on the opening part of the window keep the seals lubricated, to do this it’s simply a case of buying a pot of Vaseline and rubbing a small coating over the seals. This stops the rubber drying out increasing the life span and helps maintain the seal.

Timber windows ensure all the paint work is looking solid (no flakes or cracks) if there is fill any cracks with a 2 part exterior filler, scrape of any flakes and paint over at least 2 coats.. Now I swear by Sadolin superdec  exterior wood paint, it almost gives the timber a plastic coating and makes even rough looking timber look good, and really helps protect the timber from the elements.


Roof

It sounds obvious but no one generally does it, but look up and check out your roof, make sure there are no missing tiles even if you haven’t noticed any problem inside doesn’t mean the water isn’t slowly making its way in and eventually this will cause big problems, if there is slipped or missing tiles instruct a local builder/roofer to check it out.

Also look at the chimney, do you notice plants growing out or anything looking cracked and broken. If so get a price to sort it out (look at my article choosing a builder).

Usually if there’s a problem with the chimney tell signs internally are staining around the chimney breast. But even if there are no sign internally it doesn’t mean it doesn’t need sorting, it may be its one storm away from making its way in.


Exterior walls

Poor wall condition can cause lots of problems, damp ingress, mould, flaking paint, water staining and so on.

Even if you have cavity walls water can still work its way through. Usually in cavities debris falls down bridging the cavity and connecting the internal and external wall which is a good path for water to travel.

Insure pointing in is in good condition and there are no missing bricks or obvious holes(from pipework etc.  If it all looks in fairly good condition there is a product that helps protect the brickwork and makes it more waterproof. These products are great as they stop brickwork becoming saturated and allow water to run off more freely. There are lots of products available, Thomson water seal is a known one and this is painted on with a brush. However now there are some more environmentally friendly versions and these products also let the building breath, whereas the other products just seal it all in.

Look on my products page for these products mentioned and more information.

9 top Tips for saving money on your next property project

!!!!!Warning most of these tips do involve you getting your hands dirty!!!!

If you are pretty practical or are just happy to roll your sleeves up there are tons of ways to save money while renovating your property.

Below I will offer some top tips to save MONEY on your next project.

Tip 1 – Saving money on electrical work

Electrical work is skilled work which only qualified people can do. But before the cable is taken out of the van the electrician first needs to lift floor boards, drill holes ready for the cables, chase walls and even fix back boxes ready for sockets. This is something that you can do or a labourer at half the cost of getting the electrician to do it.

Go through with the electrician before work starts and figure out best routes to run cables and as long as they say it’s safe there is nothing stopping you doing this part of the job.

If anything they would thank you for it and at the same time you are saving a shed load of money…

Tip 2 – Saving money on loading up the site

If it’s a landscaping job or building project, materials need heaving around. For example, If you live in a particularly hard to reach place. Or your having works undertaken in the rear garden but the only access is through the house, or access is just a really long awkward trek, then a great way of saving money is to what we call “loading the job up” which essentially is getting all the materials in the area ready for the builder.

This will save a mega amount  in labour costs, you could also have the materials arranged to be dropped well before the builder is due, giving you lots of time to load the job up so you’re not rushing it.

“I would love it if one day one of my customers they would load the site up ready for me”.

Again depending on the size of the works it could save a lot of money for you.

Tip 3 – Site preparation

Prepare the area ready for the tradesperson. Sounds so simple. but literally I can spend an hour moving peoples stuff before I can do the job. So have all furniture out of the way, and even lay dustsheets down if you have them. This helps the builder out and keeps morale high, speeding the job up and saving time and money. A friend of mine did such a good job of this once that the place look liked a crime scene there was plastic sheeting everywhere. Although we laughed it saved so much time and also the additional time it would take at the end of the job clearing up. Which to be fair builders are not great at….


Tip 4 – Bathroom cost saving

If you’re having a bathroom refit and have lots of tiles to come off the wall, what about get them all of before the bathroom fitter starts work and dispose of them??  This saves the labour costs of the bathroom fitter, but be careful and be sure to wear all the correct Personal protective equipment (PPE).

Tip 5 – Carpet cost saving

Another good tip is if you are having carpets laid, clear out all the rooms ready and even have a go at taking up all the carpet and underlay. This again saves labour costs and gets the job started that much earlier in the day, meaning the fitter can potentially get more done in the day for you.

Tip 6 – Painting on new plaster

A good way to save money painting on new plaster work is to do what we call the whitewash yourself.

This is just a matter of painting the entire newly plastered wall with a watered down emulsion usually a white matt emulsion hence the name to give the plaster a first coat. Once dry this coat highlights any imperfections to the decorator and any coats on top of this will be more uniform in finish.

The beauty about this coat is that you don’t have to worry about lots of cutting in the important thing is covering all the new plaster. You will easily save money doing this yourself.

Tip 7 – I am obsessed with used selling sites like gumtree and free ads. On the build up to a project I scour these sites looking for anything that could be of possible use for my project. One of the best savings I have had recently is where I purchased 10 x packs of rock wall insulation for £15 a pack usually £38 per pack. You can find anything from internal doors, to patio slabs.

Tip 8 – Save on waste disposal

In line with tip 7, these selling sites are not only good for finding great deals they are also perfect for getting rid of stuff.

A good example is, I was doing a bathroom refit and the old suite coming out was not in bad condition. So rather than me pay to dispose, I offered it online for free to collector. This was gone the same afternoon they took it all. Saving disposal costs, saving more waste going to landfill and helping someone out all in one go.

You don’t need to necessarily give things away, ask for a few quid and make a bit of money to go towards the project. This not only saves money in disposal but also you are getting some tea and biscuit money.

Tip 9- cancel gym membership

The beauty about a lot of these money saving tips is you will be saving money further by putting  your gym membership on hold because while you are carrying out these works you will definitely not require a gym session.

.

Please remember with all these money saving tips to check with a professional before you carry out any works.

Also get a price for two options for the job, one for the trade person to carry out the labour intensive work and the other for them not to undertake that part of the job. This will then be clear from the outset the savings that you can make.

“TOP TIPS” on choosing a builder

TOP TIPS on choosing a builder

To me, it’s always good if you phone a builder and they tell you that their lead time is quite a few weeks ahead, so you will have to wait if you want them to do the job. This shows that plenty of people are using them.
If you phone a builder, and they can start the following day, this raises questions for me straight away. Obviously, sometimes they have works cancelled at the last minute so might be able to do the odd little job, but usually good builders have quite a few different jobs booked for, say, that month, so if one cancels, then there will be the next on the list to do.
This process is different for different trades. An electrician or plumber may only do what I call ‘jobbing’ jobs so they may do a few jobs in a day; if you need another socket added, which is only going to take a couple of hours, this could maybe be squeezed in the following day. This is the same for builders as well – when I started out, I would do the smaller ‘jobbing’ jobs, which meant I might have four or five jobs that week, so obviously if one cancels, there could well be some time free to get a little job in for you.
Explicitly, if you wanted quite a large renovation or an extension and the builder could start the next day, this would lead me to question them further before giving the go ahead. I know that you have just bought a new house and are eager to get the work done, but believe me, this could cost you a lot more time and money in the long run if you choose poorly.
I would always suggest a minimum of three quotes, as this will give you a good range.

I would strongly advise against going for the cheapest quote because usually, it’s too good to be true unless you have really looked into that particular builder. I have had to rectify so many jobs over the years because the customer got the cheapest guy who made a right mess, but not only that – when unforeseen works arise, which usually happens on most works, they will use this to make up the difference in price.
I have quoted for thousands of jobs in my time and always go above and beyond to give the customer the most accurate price. The perfect example is when I priced a repoint job. It was through a friend of mine, and I priced it up based on certain problems that I could see occurring. I put the price in but didn’t hear back. Somewhere down the line, my friend who first put me onto the job gave me some feedback, saying that initially, the customer thought it was expensive, so he went with someone who offered to do the job on a day rate. But the chap used was not particularly competent at the task, and by the time the job had finished, it ended up costing the customer far more than what I had offered.
Always be very wary of paying for work on a day rate. As the name suggests, this is when a tradesman will want a certain amount a day for a set number of hours, much like an hourly rate. This to me is only a good idea if you know the guys doing the work. My observation is that when trades are on a day rate, they drag the job out, as there is no incentive for them to finish more quickly. It seems to be the cheaper option to start with when you think the work should only take a couple of days, but when this ends up going on for a couple of weeks, the price totals up significantly. I very rarely do day rates on my works; all of mine are quoted. I prefer this because the customer and I are clear on what the end product will cost.

When picking a tradesman or builder, ask friends and family for recommendations – chances are they have used or know someone that they would be happy to recommend.
If you get a cheap quote in, ask the builder to break the quote down to make sure everything has been added, then make an educated decision on whether you think this particular builder can deliver at that price. I have seen so many customers suckered in to accepting the cheapest quote even though they have had two other quotes that are similar to each other, and yet they go for the one that is far below the other two. It always ends in the same poor workmanship or the builder stringing the customer on to additional works.

As the old saying goes, ‘Pay peanuts, and you get monkeys.’